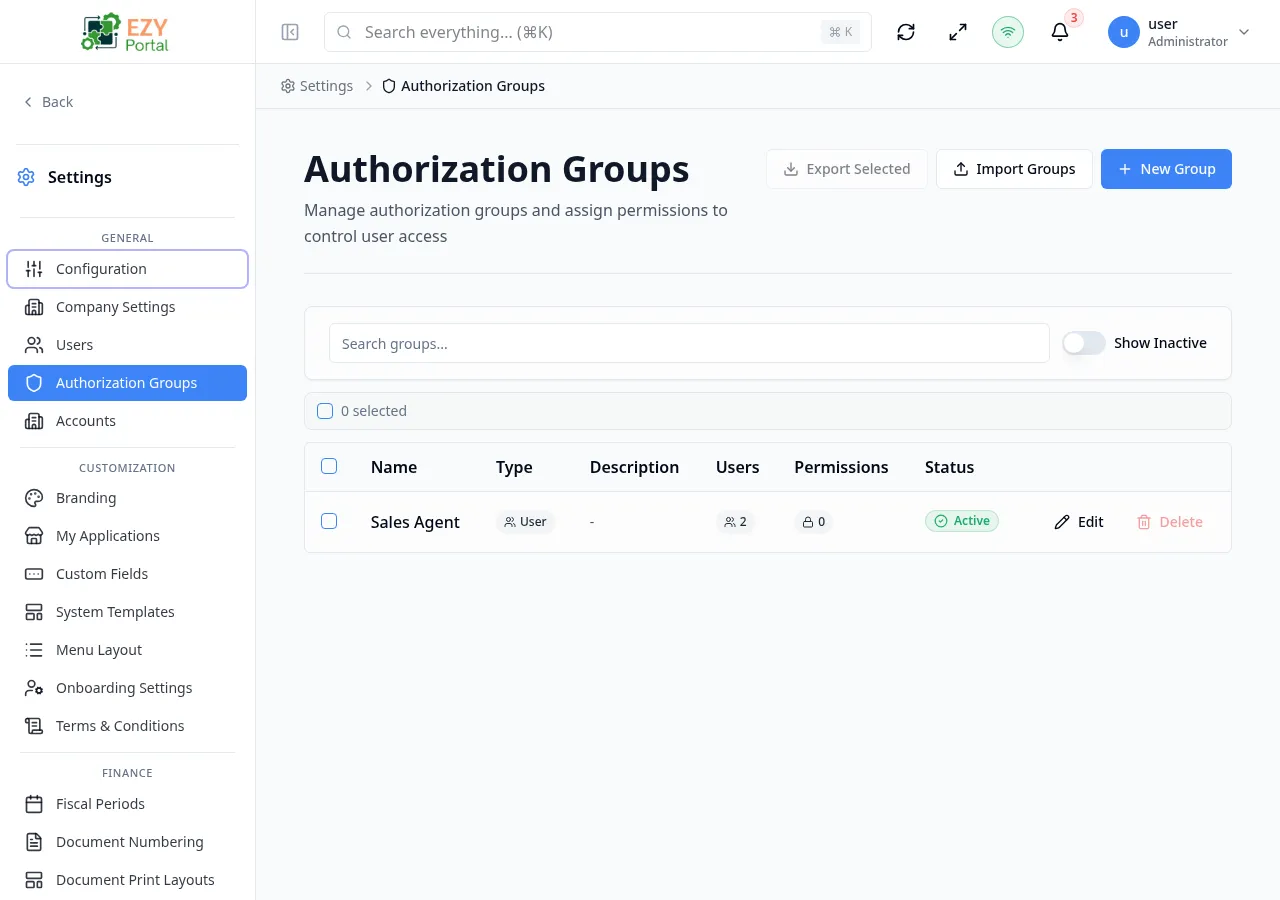
Authorization Groups
Authorization Groups package permissions into reusable profiles that are assigned to users. Tenant administrators manage tenant-level groups; account administrators use the account-scoped authorization group route for their account context.
Accessing the Page
Section titled “Accessing the Page”- Route:
/authorization-groups - Menu Path: Settings → General → Authorization Groups
- Primary audience: Tenant administrators and other users with the required admin role.
What you can do here
Section titled “What you can do here”- Search, sort, and filter authorization groups, including inactive groups.
- Create a new permission group from the New Group button.
- Edit group name, description, group type, active status, and the full permission tree.
- Export selected groups to a JSON file or import groups from a JSON file.
- Delete or deactivate groups that are no longer used.
Common tasks
Section titled “Common tasks”- Open Settings → General → Authorization Groups.
- Click New Group to open the create dialog.
- Enter a unique name and optional description, then click Create Group.
- The group detail page opens — configure permissions in the Permissions section.
- Use bulk actions (Grant All Read, Grant All Write, Grant All Admin, Clear All) to set permission levels quickly.
- Save the group, then assign it to users from the Users page.
- Changing a group’s permissions immediately affects every user assigned to that group. Review membership before removing permissions.
- A group name must be unique within the tenant. The name field validates availability in real time.
- Group Type (User vs. Tenant API Key) is locked after creation and cannot be changed.
- Groups deleted from the list are moved to Trash and can be restored.
Creating an Authorization Group
Section titled “Creating an Authorization Group”Click New Group in the page header. A small creation dialog opens where you name the group and pick its type. After saving, the system navigates to the full group form to configure permissions.
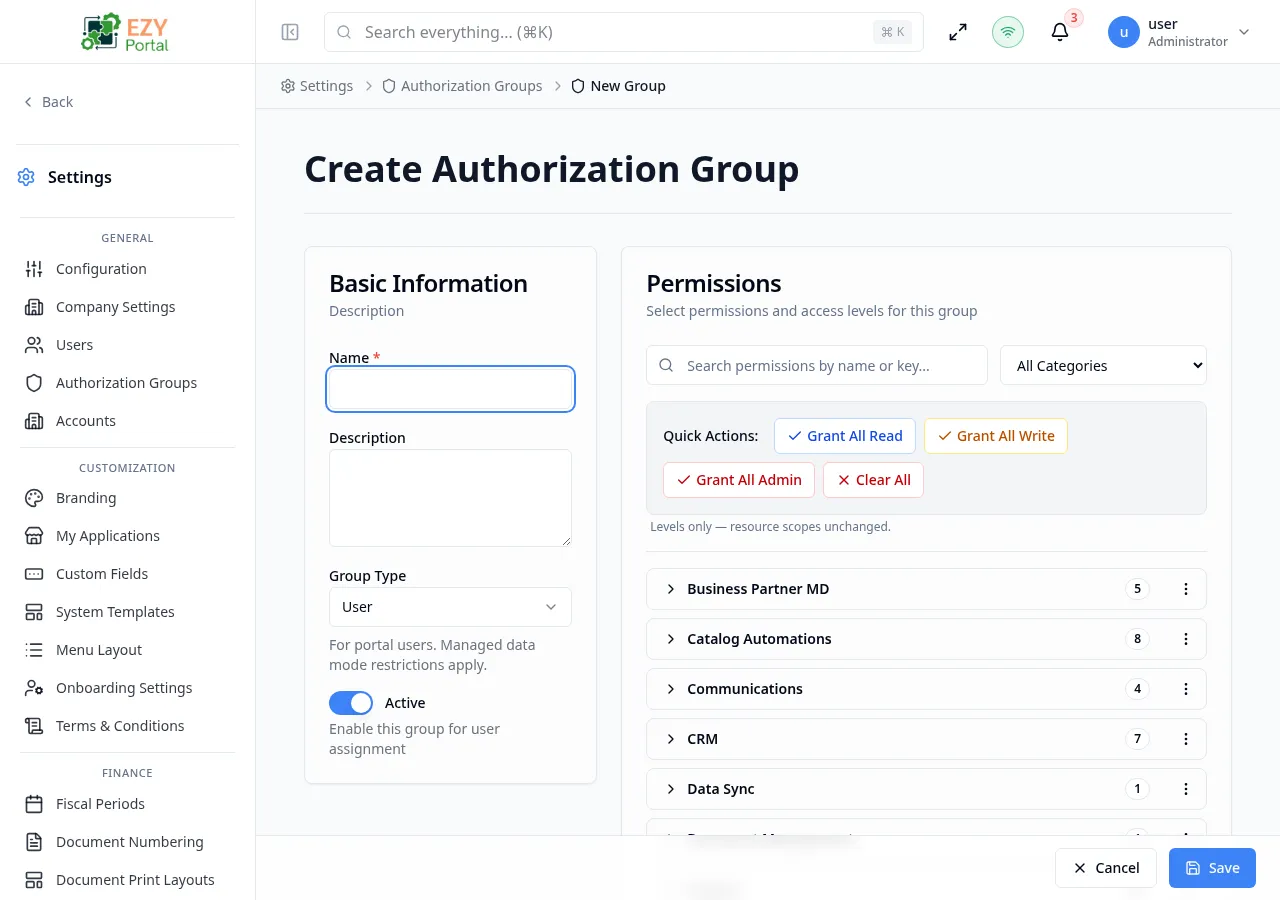
Fields
Section titled “Fields”| Field | Required | Type | Description | Default | Validation |
|---|---|---|---|---|---|
| Name | Yes | Text | Unique display name for the group | — | Required; validated for uniqueness in real time |
| Description | No | Textarea | Optional description of the group’s purpose | — | — |
| Group Type | Yes | Select | Scope of the group: User (for portal users) or Tenant API Key (for API key access) | User | Read-only after creation |
| Active | — | Toggle | Enables the group for assignment to users | On | — |
Steps:
- Click New Group in the page header.
- Enter a unique Name and optional Description.
- Choose Group Type: select User for portal users or Tenant API Key for API key access.
- Leave Active on unless the group should be inactive at creation.
- Click Create Group. The system opens the group form.
- On the group form, configure permissions in the Permissions section and click Save.
The full group form (drill-down) provides two sections:
- Basic Information — Name, Description, Group Type, Active toggle.
- Permissions — searchable, categorized permission tree with level selectors (None, Read, Write, Admin) and resource scope controls.
Editing an Authorization Group
Section titled “Editing an Authorization Group”Open row actions on a group and select Edit to open the edit dialog for quick metadata changes, or click the group name to open the full form for permission editing.
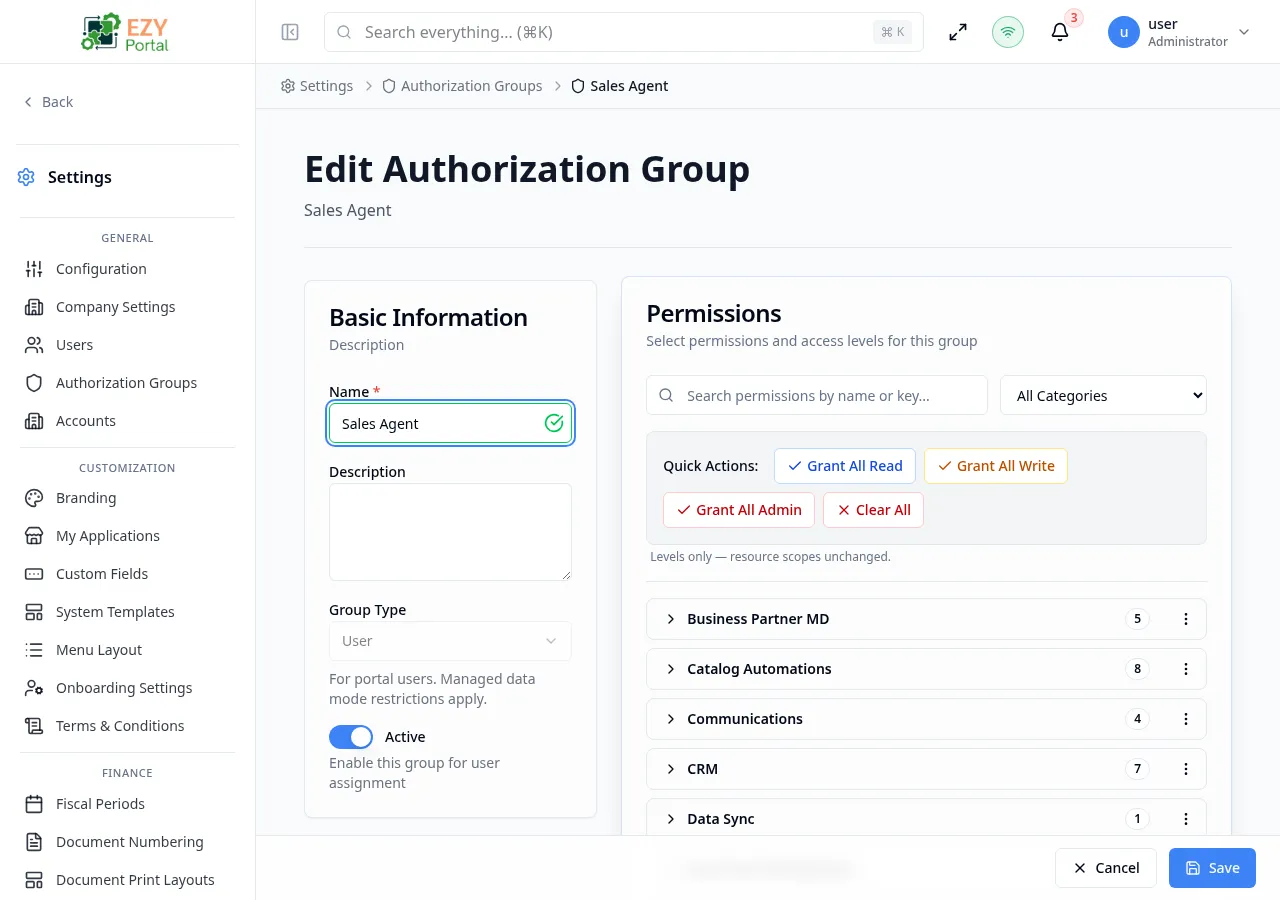
Same fields as Creating. Group Type is read-only after creation and cannot be changed.
The full edit form provides identical sections to the create form for deeper permission management.
Deleting / Deactivating an Authorization Group
Section titled “Deleting / Deactivating an Authorization Group”Open row actions on the target group and choose Delete to move the group to Trash, or open the edit form and set Active to Off to deactivate it while retaining history.
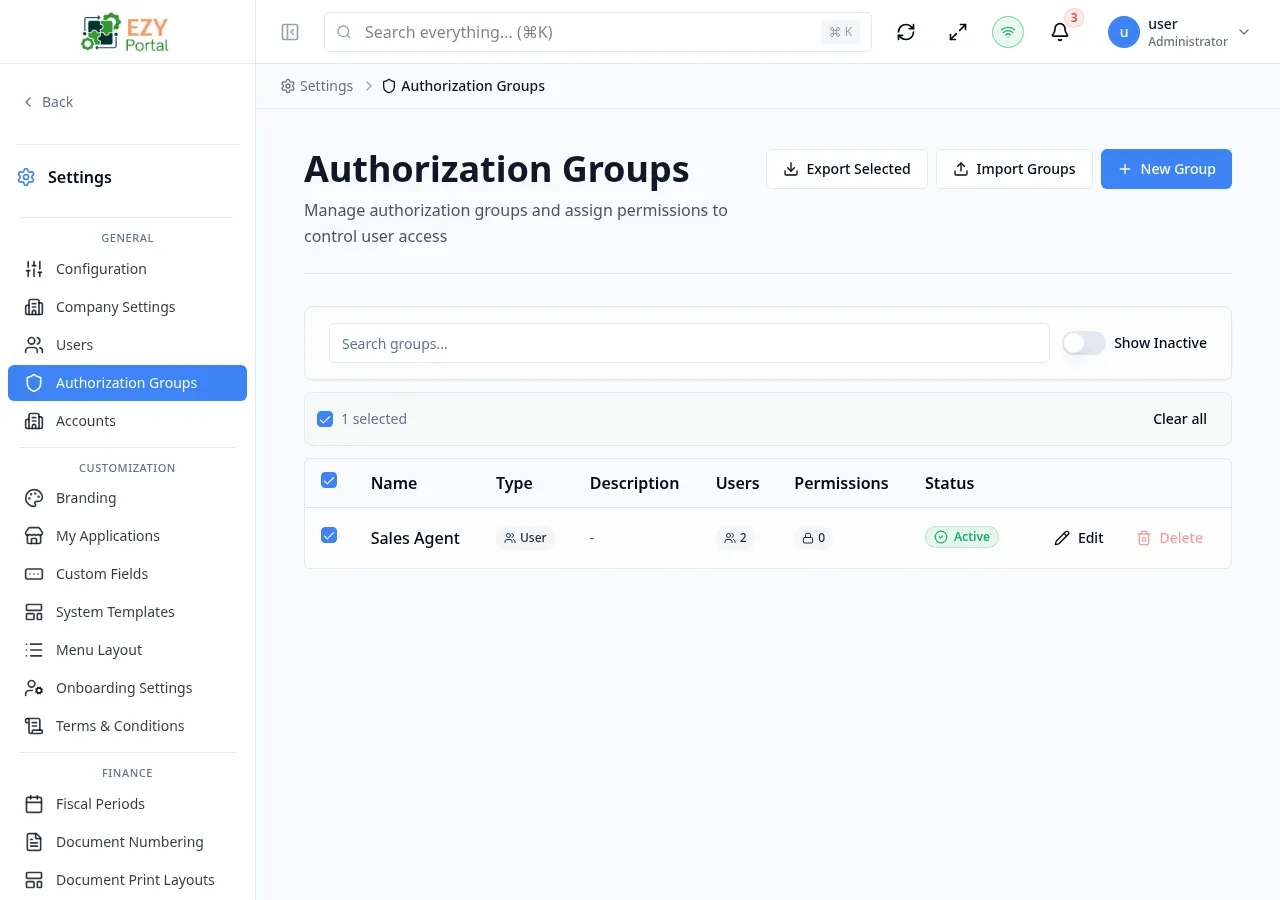
- Open row actions on the target group.
- Select Delete (moves to Trash, recoverable) or open the group and toggle Active to Off (deactivates, retains history).
- Confirm deletion in the dialog.
Note: Deleting a group that has active user assignments is permanent for those assignments — users will lose the permissions the group provided. Reassign users to a replacement group before deleting.