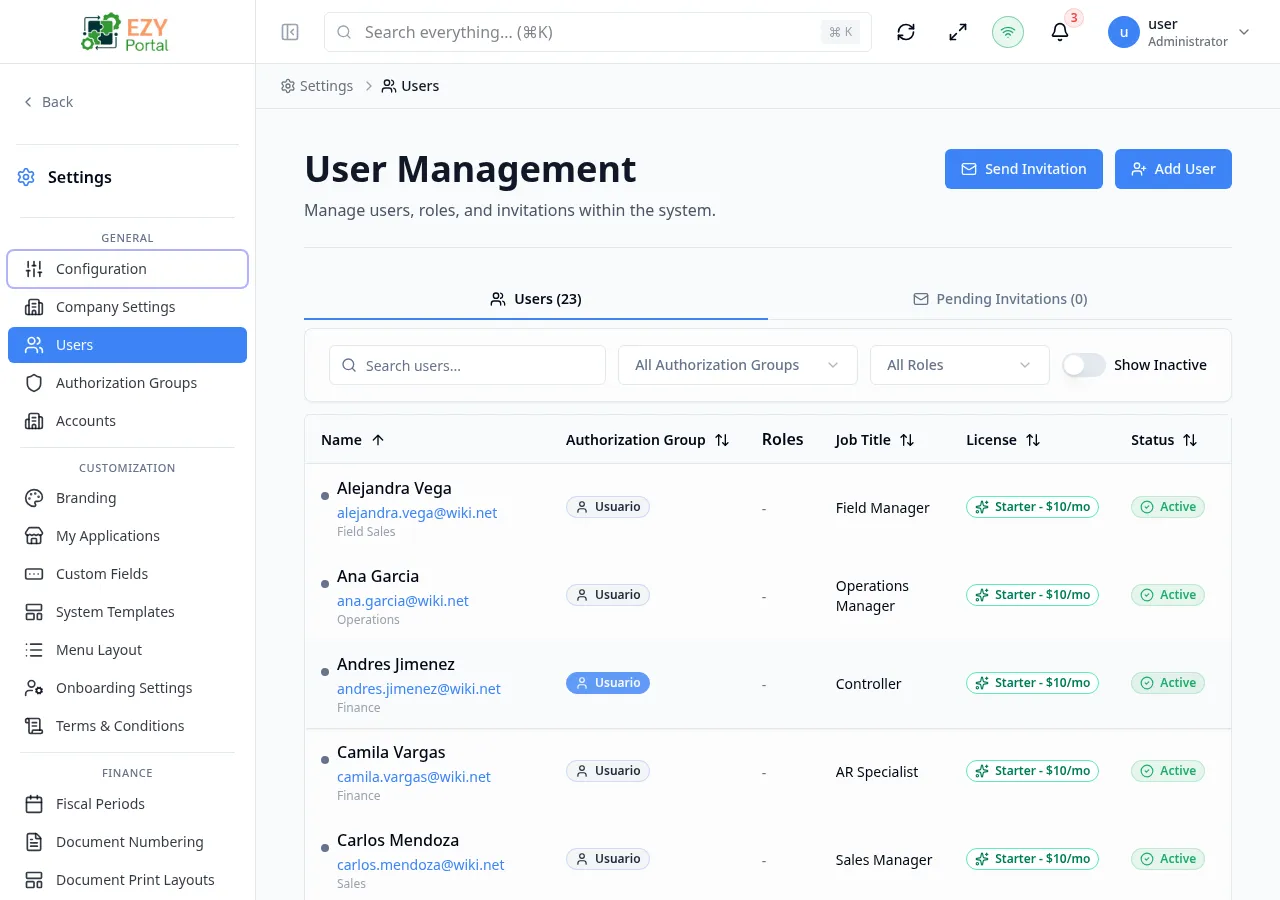
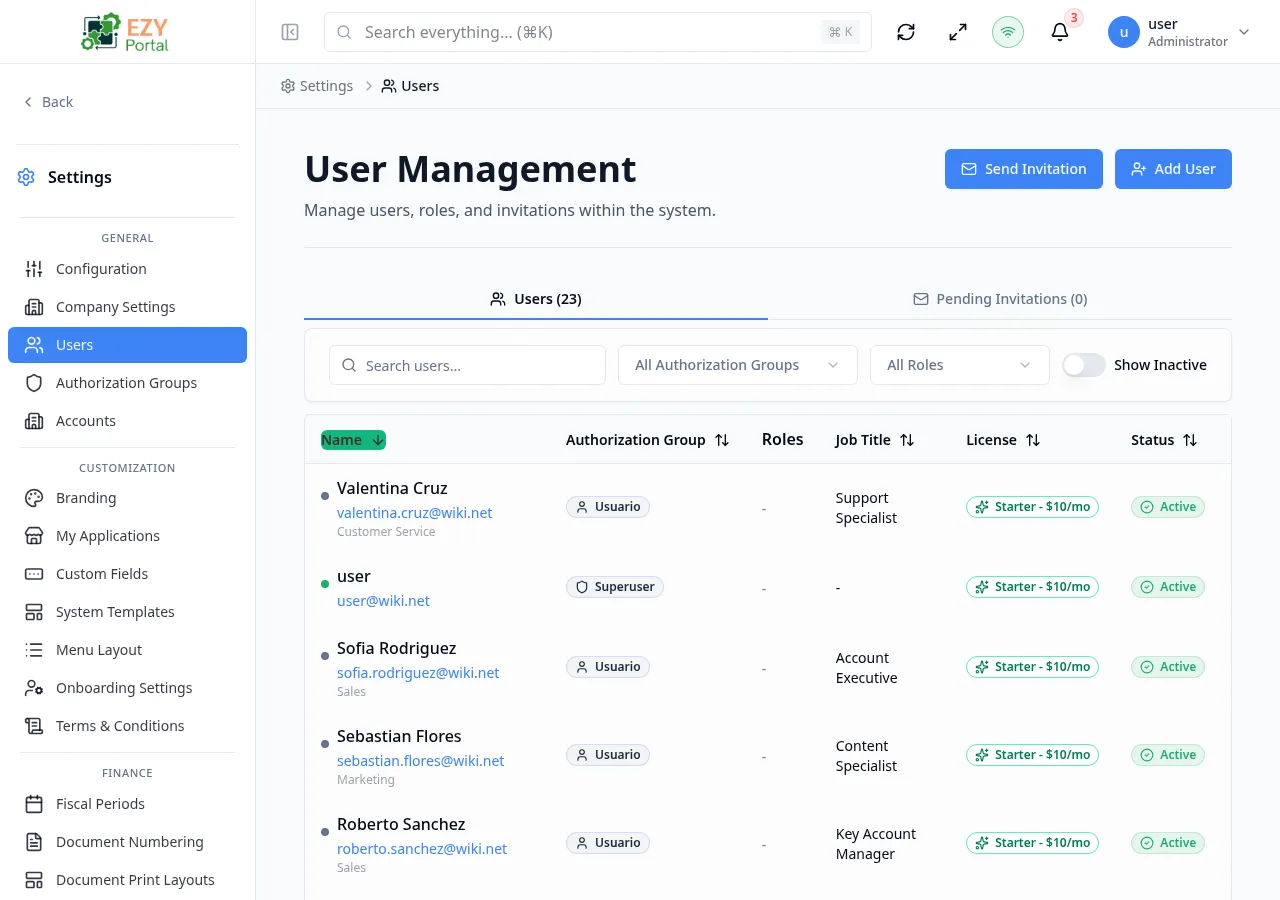
Users
The Users page is the main workspace for managing people who can access the portal. Tenant administrators can view the full tenant user list and manage pending invitations; account administrators are routed to an account-scoped user experience.
Accessing the Page
Section titled “Accessing the Page”- Route:
/users - Menu Path: Settings → General → Users
- Primary audience: Tenant administrators and other users with the required admin role.
What you can do here
Section titled “What you can do here”- Search, filter, sort, and paginate the user list.
- Send email invitations and monitor pending invitations from the Invites tab.
- Create a user directly using the Add User button.
- Edit profile details, authorization group, roles, license tier, and active status.
- Deactivate or delete users.
Common tasks
Section titled “Common tasks”- Open Settings → General → Users.
- Use the search box or filters to locate the user or invitation.
- Select Add User to create a user directly, or Send Invitation to send an email invite.
- Fill in the required fields and save.
- Use row actions to edit profile, authorization, license, or status after creation.
- Verify the user appears in the list with the expected role and access level.
- At least one active Authorization Group must exist before you can create a non-superuser account. If none exist, the dialog shows a warning and the Create User button is disabled.
- Deactivating a user preserves their historical activity for audit purposes. Deleting a user sends them to the Trash and they can be restored.
- You cannot delete or deactivate your own account. The system blocks self-deletion and warns against self-deactivation.
- The License Tier section is hidden when the tenant uses an unlimited license plan.
Creating a User
Section titled “Creating a User”Click Add User in the page header to open the Create User dialog. Fill in the required identity fields, assign an authorization group or mark the user as a Superuser, and save.
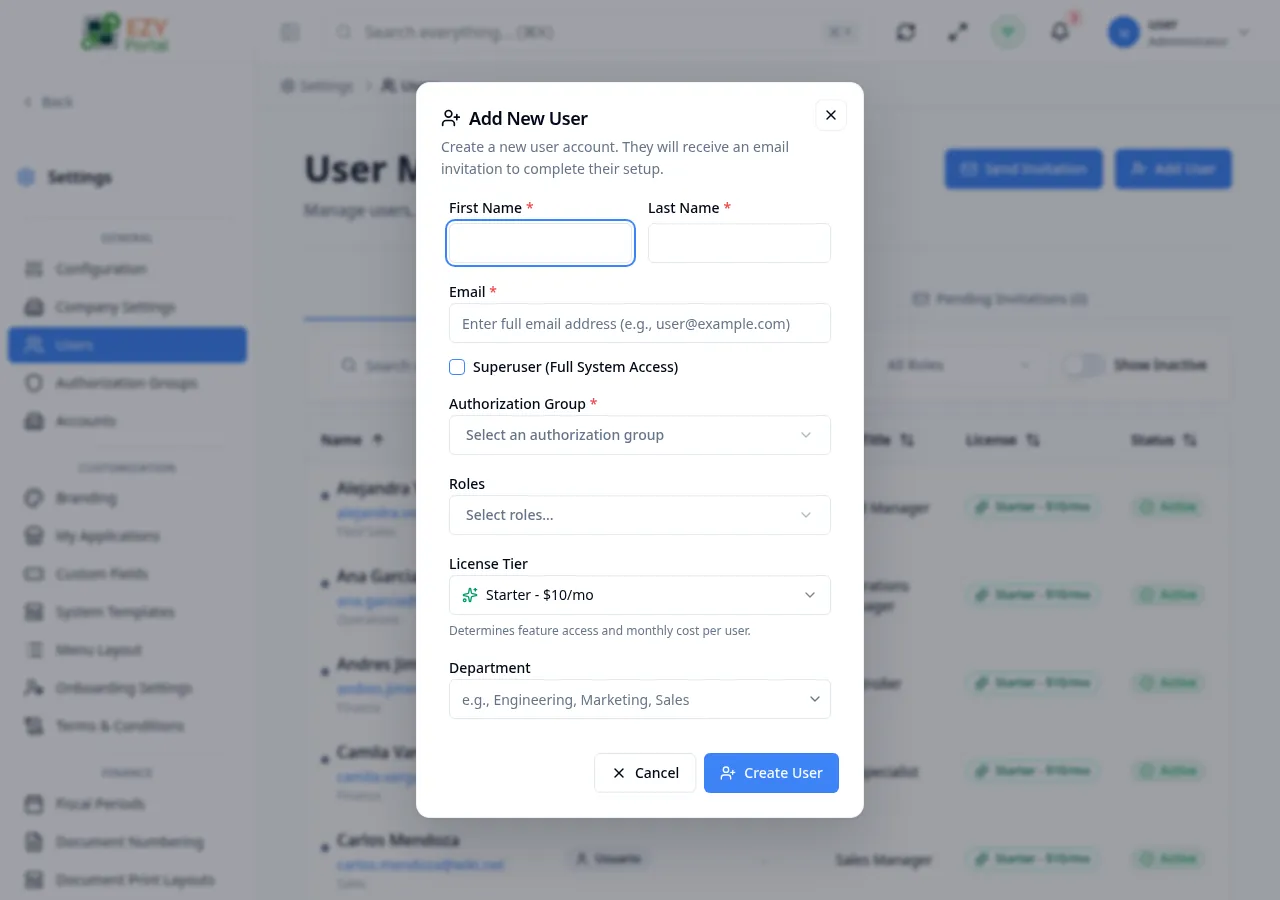
Fields
Section titled “Fields”| Field | Required | Type | Description | Default | Validation |
|---|---|---|---|---|---|
| First Name | Yes | Text | User’s first name | — | Min 2, max 50 chars; letters and spaces only |
| Last Name | Yes | Text | User’s last name | — | Min 2, max 50 chars; letters and spaces only |
| Yes | Work email address used for login | — | Must be a valid email; checked for duplicates in real time | ||
| Superuser | No | Toggle | Grants unrestricted access to all system features | Off | When on, Authorization Group is hidden and not required |
| Authorization Group | Yes (conditional) | Entity select | Permission group for the user | — | Required unless Superuser is checked; only active User-type groups shown |
| Roles | No | Multi-select | Additional functional roles to assign | — | — |
| License Tier | No | Select | Determines feature access and monthly cost | Starter | Options: Starter, Pro, Business; hidden on unlimited plans |
| Department | No | Combobox | User’s department | — | — |
| Job Title | No | Combobox | User’s job title | — | — |
| Primary Phone | No | Text | Primary contact phone number | — | Max 30 chars |
| Secondary Phone | No | Text | Secondary contact phone number | — | Max 30 chars |
| Date of Birth | No | Date | User’s date of birth | — | — |
| Gender | No | Select | Options: Male, Female, Other, Prefer Not to Say | — | — |
Steps:
- Click Add User in the page header.
- Enter the user’s First Name, Last Name, and Email.
- Check Superuser if the account requires full system access, or select an Authorization Group.
- Optionally select Roles, License Tier, Department, Job Title, and contact details.
- Click Create User. The user receives an email to complete their account setup.
Editing a User
Section titled “Editing a User”Row actions on any user row provide access to multiple edit dialogs. Each action targets a specific aspect of the user record.
The available edit actions are:
- Edit Profile — updates First Name, Last Name, Department, Job Title, Roles, Primary/Secondary Phone, Date of Birth, Gender, and the Active toggle. Email is read-only after creation.
- Change Authorization Group — updates the user’s authorization group or Superuser flag independently.
- Change License — updates the License Tier independently.
The full-page edit form (accessible via the Users create/edit full page) provides the same fields as the Create dialog. Email is read-only in edit mode.
Deleting / Deactivating a User
Section titled “Deleting / Deactivating a User”Users can be deactivated (preserving history) or deleted (moved to Trash) from row actions.
- Open row actions on the target user.
- Select Delete User to remove the user (recoverable from Trash), or use Edit Profile and toggle User is active to Off to deactivate.
- Confirm in the dialog.
Note: You cannot delete or deactivate your own account. The Superuser role cannot be removed from yourself if it is the only admin account.
Related Pages
Section titled “Related Pages”- Authorization Groups — create permission groups before adding users
- Accounts — manage external account records and their users